Tie-dye is an art form that lets you transform plain garments into colorful, unique pieces using various folding techniques. Whether you’re a beginner or an experienced tie-dyer, experimenting with different patterns can lead to stunning designs. In this guide, we’ll walk you through popular tie-dye techniques and how to apply them to various garments, from shirts to sneakers.
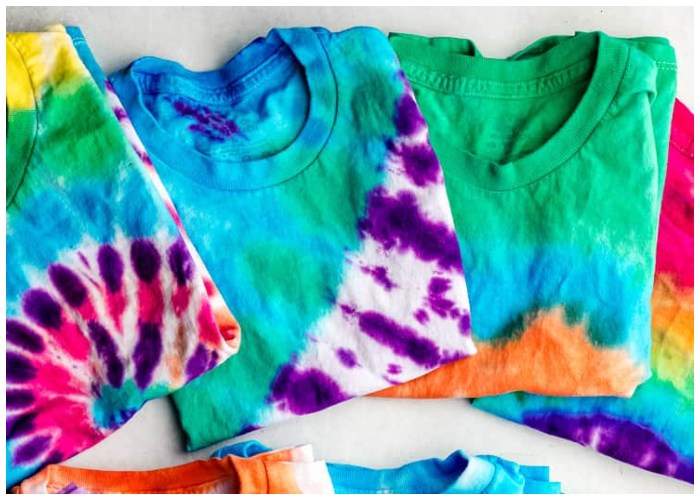
Popular Tie-Dye Patterns
Scrunch or Nebula: This is one of the simplest designs. Lay your shirt flat and scrunch the fabric into a tight disk. Secure the disk with several rubber bands. The tighter you scrunch, the more white space will appear on your shirt, creating a starry, nebula-like effect.
Swirl: Pinch the fabric in the center and twist it into a spiral shape, like a cinnamon roll. Once the shirt is fully twisted, secure it with rubber bands that crisscross over the center of the spiral. A tighter twist results in more white space between the colored sections.
Bullseye: Create a bullseye effect by pinching a section of fabric from the center and pulling it up to form a cone shape. Wrap rubber bands around the cone, spacing them as desired to create multiple rings of color.
Sunbursts: This pattern involves making several smaller bullseye designs. Pinch multiple sections of fabric to create mini cone shapes and secure each with rubber bands. When dyed, these sections will resemble little bursts of color across the fabric.
Stripes: Lay your shirt flat and fold it accordion-style from one side to the other. Wrap the folded shirt with rubber bands every couple of inches. Once dyed, this technique produces horizontal or vertical stripes.

Square Box Folds: Fold the fabric accordion-style both lengthwise and widthwise to form a square shape. Place cardboard squares on either side of the fabric, and secure them with rubber bands. The final result is a bold, geometric pattern.
Triangle Folds: Similar to the square fold, but in this technique, you fold the fabric into triangles instead of squares. Secure the triangles between cardboard pieces and use rubber bands to hold them in place.
Kaleidoscope or Mandala: To create a mandala effect, fold the shirt in half lengthwise, then again widthwise. Secure the shirt with rubber bands to create symmetrical designs. You can dye each section a different color to achieve the kaleidoscope look.
Ombre Dip-Dye: This method doesn’t require folding. Simply dip one end of the garment into a bucket of dye. Allow the dye to gradually seep upwards to create an ombre effect. You can also dip the other end in a different color for a two-tone design.
Heart: Fold the shirt in half and draw half of a heart shape along the fold with a washable marker. Make small accordion pleats along the drawn line, secure it with rubber bands, and apply dye. The result is a bold heart-shaped pattern at the center of your shirt.
Tie-Dyeing Other Items
Tie-dye isn’t limited to shirts. You can experiment with other items like hoodies, sweatpants, socks, and even sneakers.
- Hoodies and Sweatpants: Thicker fabrics, like sweatshirts and pants, work best with simple techniques like the crumple or swirl. While intricate designs can be done, they are more challenging on thicker materials.
- Sneakers: Cotton canvas sneakers can be dyed for a vibrant, personalized look. Start by removing the laces and liners, and prewash the sneakers with Synthrapol. Apply dye with squirt bottles or paintbrushes for the best coverage.
- Socks: Socks are quick and easy to tie-dye. You can twist or fold them to create mini tie-dye designs. They’re small, so simpler patterns like stripes or the scrunch technique work best.
Tips for Best Results
- Prewash Your Fabric: Always prewash garments to remove any dirt, oils, or sizing that may prevent the dye from fully saturating the fabric. Use a detergent like Synthrapol for the best results.
- Dyeing Wet vs. Dry Fabric: Tie-dying slightly damp fabric will allow the dye to saturate the fabric more evenly, resulting in vibrant, consistent colors. Dyeing dry fabric can create more white spaces and a more marbled effect.
- Setting the Dye: After applying the dye, allow the garment to sit for 6-8 hours, preferably wrapped in plastic to keep it moist. Letting the dye sit longer—up to 24 hours—results in the brightest colors.
- First Wash: Rinse your tie-dyed items under cold running water until the water runs clear. Wash the item alone in cold water using a color-safe detergent. For the first few washes, it’s best to wash tie-dyed items separately to avoid bleeding.
- Bright Colors: To achieve vibrant tie-dye results, use fiber-reactive dyes on 100% cotton fabrics. Soak your fabric in soda ash (if your dye requires it) to help the colors set, and be patient, allowing the dye to process for as long as possible before rinsing.