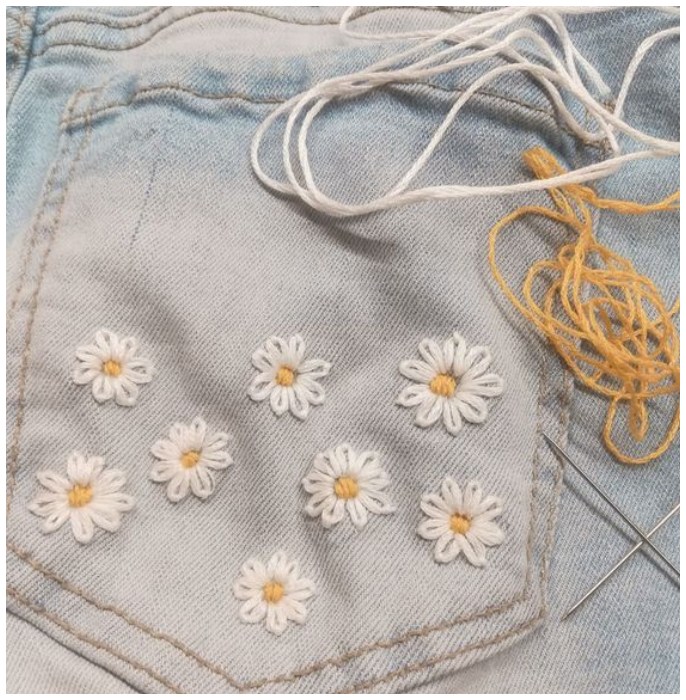
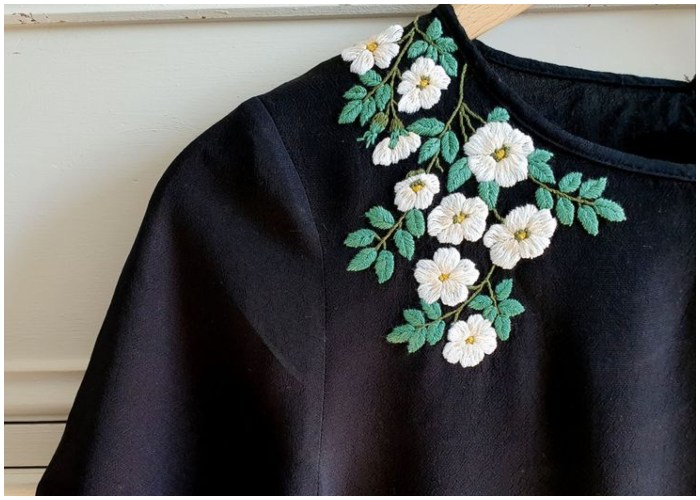
Embroidered clothing has become a huge trend, and there’s no need to rely on store-bought pieces when you can create your designs right at home. Whether personalizing your favorite jeans, a t-shirt, or a jacket, embroidery adds a creative and unique touch to your wardrobe. In this guide, I’ll walk you through the process of creating your own embroidered designs on clothing. It’s surprisingly simple, even for beginners. Follow these steps and tips, and you’ll be able to customize any clothing item with ease.
When I first saw simple line drawings of faces popping up everywhere, I knew I had to try it out myself. After giving it a go on a pair of jean shorts, I fell in love with how they turned out. I’m excited to share the tutorial and a simple trick that makes embroidered designs virtually foolproof. This method is perfect for anyone just starting out with embroidery. You can use it to create any design you want. I’m including a free downloadable face design to help you get started.
Materials You’ll Need for Embroidery
The best part about this project is how affordable it is. Here’s what you’ll need:
- Embroidery thread/floss
- Embroidery needle (or any needle with a large enough eye for floss)
- Clothing item (jeans, t-shirt, jacket, etc.)
- Scissors
- Straight pins
- Tracing paper or thin printer paper
- (Optional) Free downloadable design for tracing
Step 1: Create or Print Your Design
Start by drawing a design onto a thin paper (tracing paper works best). If you’re unsure where to start, you can download a free face design I’ve included, which is perfect for this project. Print it onto thin paper to use as a guide.
Step 2: Cut Around the Design
Once your design is ready, cut around it, leaving a little space around the edges. You don’t want too much extra paper, which may be harder to sew around. Keep the area manageable but not too tight.
Step 3: Pin the Paper to the Clothing
Place the paper with the design onto the clothing where you want the embroidery to go. Pin it in place. Tracing paper makes this process easier because you can see through it and adjust the placement to fit around seams, pockets, or other details on the garment.
Step 4: Prepare the Needle and Thread
Now, it’s time to get your needle ready. Thread the needle with embroidery floss, making sure to tie a knot at the end. Use a longer piece of floss than you think you’ll need—double or even triple it if you want bold, thick lines.
Step 5: Start Embroidering
Begin by pushing the needle through the underside of the clothing to hide the knot. Sew the design through both the paper and the fabric. For beginners, the backstitch or split stitch are the best options because they create solid lines and are easy to master.
- Back Stitch: Make one stitch, then go backward to connect the second stitch to the first by going through the end of the last stitch.
- Split Stitch: Make a stitch, then push the needle through the middle of the stitch and continue stitching along the design.
Continue until the entire design is sewn onto the fabric.
Step 6: Knot and Finish
Once you’ve completed the design, tie another knot on the inside of the clothing to secure the thread. Cut any excess thread and ensure the embroidery is tight and clean.
Step 7: Remove the Paper
Gently rip away the paper from the design. Be careful not to pull too hard, as this may affect the embroidery. Take your time with this step to ensure the design remains intact.
Embroidery Tips for Beginners
- Start simple: Choose an easy design for your first project, like a line drawing or simple shapes. The more you practice, the more comfortable you’ll get with more detailed designs.
- Experiment with stitches: Once you master basic stitches like the back or split stitch, try experimenting with other stitches to add texture and variation to your designs.
- Use quality materials: Invest in good-quality embroidery floss and needles to ensure a smooth process. Poor-quality materials can lead to frustration, especially for beginners.
A Fun, Easy Way to Customize Your Wardrobe
Embroidery may seem intimidating, but with the proper technique, it’s a fun and easy way to add a personal touch to your clothing. Following this guide, you can create embroidered designs to stand out and show your creativity. The possibilities are endless, whether you’re stitching on jeans, a jacket, or a t-shirt.
So grab your materials and start creating! Once you try this DIY embroidery project, you’ll be hooked on personalizing your clothes quickly.