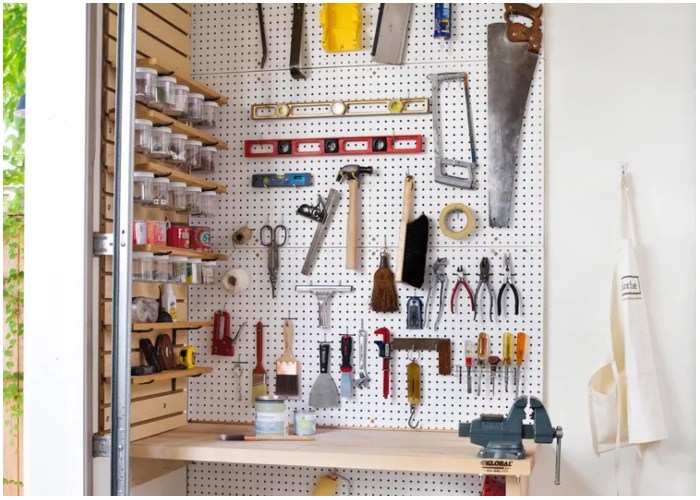
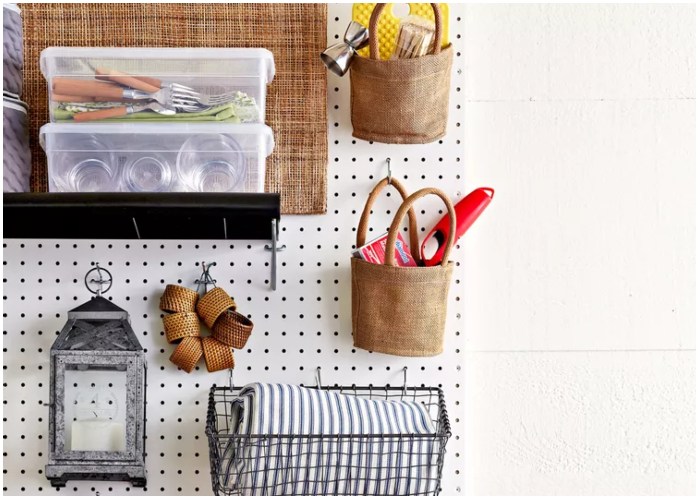
Pegboard, often seen in workshops and garages, is a versatile and practical solution for organizing tools and accessories. Typically made from tempered hardboard, pegboard features pre-drilled holes in a grid pattern, which allows for the easy arrangement of wire hangers. This simple yet effective system keeps workspaces tidy and items accessible. One of the main reasons for pegboard’s popularity is its adaptability; it can be cut to fit any space, making it an excellent choice for various storage needs. Whether you are outfitting a basement, garage, workshop, or garden shed, this guide will walk you through the essential steps to selecting the right pegboard material and installing it securely.
Choosing the Right Pegboard Material
When it comes to selecting a pegboard material, the most common choice is tempered hardboard due to its affordability and availability. However, tempered hardboard is not ideal for all environments, particularly those with high humidity, as it is prone to moisture damage. If you are planning to install a pegboard in a damp or humid area, you might want to consider other materials like metal or plastic. Metal pegboards are robust, water-resistant, and can handle heavy-duty loads, making them a great option for tool-heavy workshops or garages. On the other hand, plastic pegboards are lightweight and moisture-resistant, making them suitable for high-humidity areas like basements. However, plastic boards are harder to cut to size, which may limit their versatility. Consider the environment and the types of items you’ll be storing when choosing the right pegboard material for your needs.
Safety Considerations for Installing Pegboard
While pegboards are excellent for keeping tools and accessories organized, their effectiveness depends heavily on proper installation. Improper installation can lead to the pegboard tearing off the wall, potentially causing damage to your tools and the wall itself. Before installation, assess the environmental conditions of the area where the pegboard will be placed. If the space is prone to humidity, ensure that the material you choose can withstand these conditions. Additionally, it’s crucial to measure and mark the installation site accurately, ensuring that the pegboard can be securely anchored to wall studs or appropriate wall anchors. The supports you choose must be capable of handling not only the weight of the pegboard but also the cumulative weight of the tools and accessories you plan to hang. Taking these precautions will help ensure that your pegboard remains secure and functional over time.
Step-by-Step Guide to Hanging Pegboard
Installing a pegboard might seem straightforward, but following a detailed process ensures it is secure and effective. Begin by selecting a suitable location, preferably where the pegboard can be mounted directly to wall studs for maximum support. Use a stud finder to locate the studs if they are hidden behind drywall. Once you have marked the height and edges of the pegboard, it’s time to measure and cut the pegboard and furring strips. Furring strips, which are 1×2-inch boards, create the necessary space between the wall and the pegboard to allow hooks to be inserted without obstruction.
After cutting the pegboard and furring strips to the appropriate size, attach the furring strips to the pegboard or directly to the wall studs using ¾-inch wood screws. Ensure that the furring strips are aligned with the wall studs for maximum stability. Once the furring strips are in place, mount the pegboard by driving 2-½-inch wood screws into the top corners, making sure the board is level before securing the bottom corners. Finally, you can organize your tools by attaching hooks or hangers to the pegboard holes, choosing different sizes of hooks based on the weight and size of your tools.
Alternative Installation Methods for Various Wall Types
In some situations, such as when working with drywall, metal, or concrete walls, you may not have access to wooden studs for secure pegboard installation. Fortunately, there are alternative methods to ensure your pegboard is properly supported. For metal walls, screws designed for metal studs can be used to install furring strips, while drywall anchors with spacers can be employed to mount pegboards directly to drywall. If you are working with a concrete wall, concrete anchors are necessary, as they provide a secure grip within the masonry material. Always choose anchors rated for the weight of your pegboard and the tools you plan to hang. By following these installation methods, you can successfully mount a pegboard on various wall types, ensuring a secure and organized workspace.