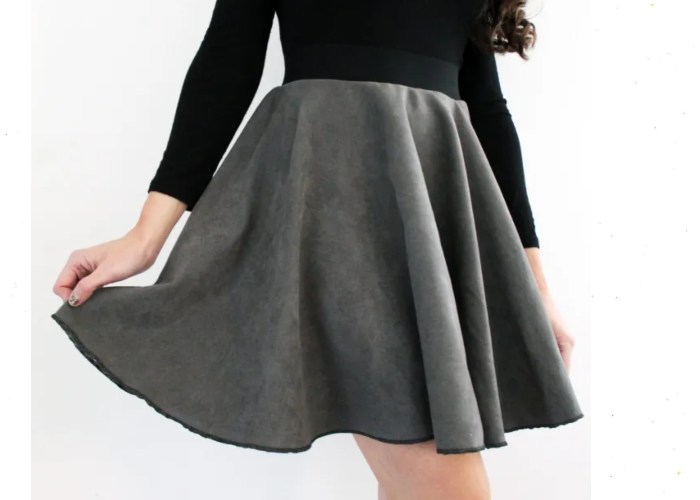
Creating your own circle skirt is a fun and fulfilling sewing project that allows you to express your personal style while adding a versatile piece to your wardrobe. Whether you’re a seasoned seamstress or just starting out, a circle skirt is a great project to test your skills and creativity. Known for its flattering fit and twirl-worthy design, a circle skirt can be customized in various fabrics and lengths to suit any occasion, from casual outings to formal events. In this guide, we’ll take you through the entire process, from gathering your materials to the final stitches, ensuring you end up with a beautiful and professional-looking garment. Let’s get started!
Getting Started: Materials and Preparation
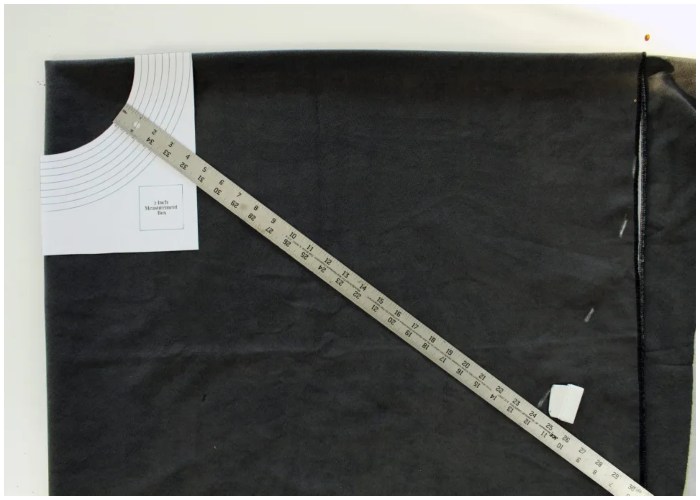
Before you begin, gather all the necessary materials. For this project, you’ll need two yards of faux suede fabric, a basic sewing machine, tailor’s chalk, dressmaker shears, a yardstick, and 2-inch wide black elastic. The faux suede is chosen for its texture and drape, making it an ideal choice for a skirt that stands out. Start by downloading the free printable circle skirt pattern, which includes a measurement square to ensure the dimensions are accurate. Print the pattern without adjusting the scale, then cut it out according to your waist measurement.
Cutting and Assembling the Skirt
Fold your fabric into four layers and place the pattern at the folded corner where the edges meet. This placement will ensure that when you cut the fabric, you’ll have a seamless circle skirt. Use your yardstick and tailor’s chalk to measure the desired length of the skirt from the waistline, marking a consistent length all around to maintain an even hemline. After cutting out the skirt, you can see the shape starting to form. Next, create the elastic waistband by cutting the elastic to your waist measurement. Sew the ends of the elastic together to form a loop.
Finishing Touches: Sewing and Hemming
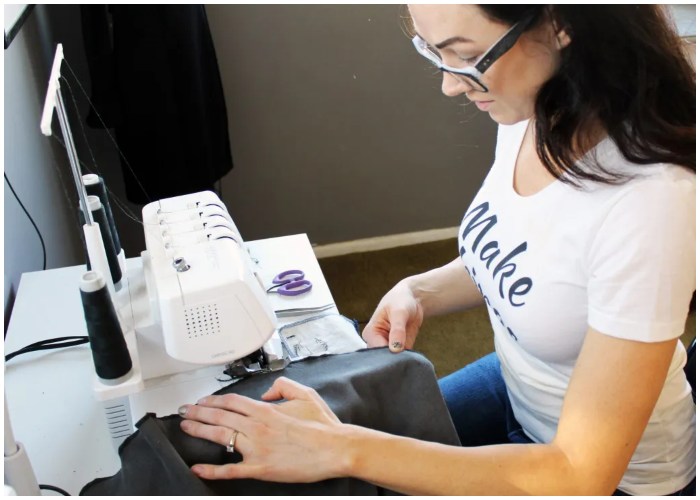
With the elastic waistband ready, the next step is to attach it to the skirt. Align the elastic with the waistline of the skirt and pin it in place. Sew the waistband to the skirt using a zigzag stitch, which will allow the fabric to stretch while maintaining a clean finish. After the waistband is secure, hem the bottom edge of the skirt to complete the look. If you’re using faux suede, the fabric’s weight will give the skirt a beautiful drape, making it ideal for both casual and dressy occasions.
Tips for Personalizing Your Circle Skirt
One of the best things about making your own circle skirt is the ability to customize it to your liking. Consider experimenting with different fabrics, such as a lightweight cotton for summer or a heavier wool blend for winter. You can also adjust the length of the skirt to create anything from a flirty mini to an elegant maxi skirt. If you’re feeling adventurous, try adding pockets or lining the skirt for a more polished look. The possibilities are endless, and each variation will bring a new dimension to your wardrobe.
Conclusion
Creating a circle skirt is a rewarding project that combines simplicity with style. Whether you’re new to sewing or an experienced crafter, this skirt offers a great way to express your creativity. By following these steps and using the recommended materials, you’ll end up with a piece that’s not only fashionable but also uniquely yours. So grab your supplies, clear a space in your sewing room, and get ready to add a stunning new item to your closet. Happy sewing!