A laundry chute can be a great addition to your home, adding convenience and efficiency to your daily chores. By installing a laundry chute, you’ll minimize the need for multiple trips up and down stairs with laundry baskets, saving both time and energy. This guide will walk you through the process of choosing an appropriate location for a laundry chute, installing it, and ensuring compliance with local building codes.
Preparation and Planning
Step 1: Choosing the Right Location
- Identify the Ideal Spot: The best location for a laundry chute is often in a hallway where the chute can run directly between the floors without obstructions. Walls parallel to floor joists are ideal as they are more likely to have fewer obstructions.
- Use a Stud Finder: To avoid electrical wiring and plumbing, use a stud finder to locate the studs in the wall. Drill a small exploratory hole to ensure there are no hidden obstacles.
- Check Local Codes: Before proceeding, check with your local building department to ensure that installing a laundry chute complies with local fire codes and building regulations.
Installation Process
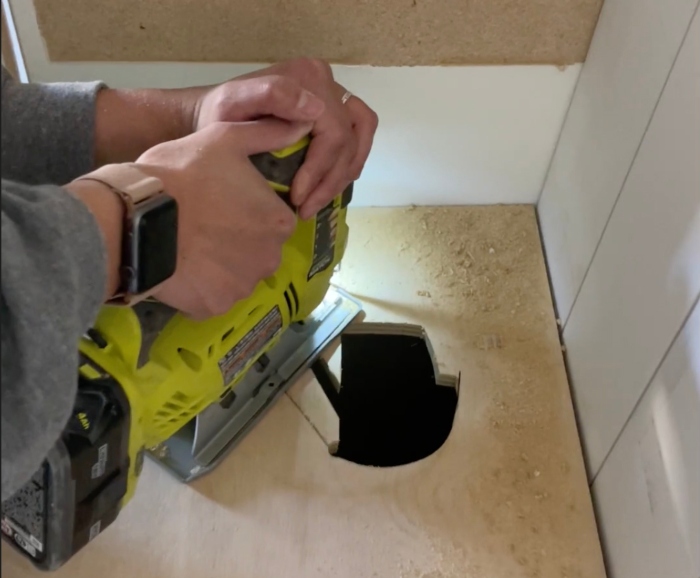
Step 2: Prepare the Installation Area
- Open the Wall: Start by removing the baseboard and cutting out the drywall between two studs to the required height (typically about 42 inches). Use a drywall saw for precision.
- Remove the Base Plate: Cut and carefully remove the base plate between the studs, making sure not to damage the opposite side of the wall.
- Prepare the Upper Frame: Install a horizontal 2×4 block between the studs at the top of the cutout to serve as a frame for the laundry chute door.
Step 3: Install the Metal Duct
- Assemble the Duct: Use galvanized heating ducts and a 90-degree elbow that fits your space. Snap the duct pieces together.
- Modify the Duct Opening: If necessary, use metal snips to adjust the opening of the 90-degree elbow so it aligns slightly smaller than the laundry door opening. This helps prevent items from snagging.
- Secure the Duct: Attach the duct to the framing using sheet metal screws. Ensure it is stable and secure.
- Seal Joints: Use duct tape to seal the joints between duct pieces and any sharp edges to ensure that clothes do not snag.
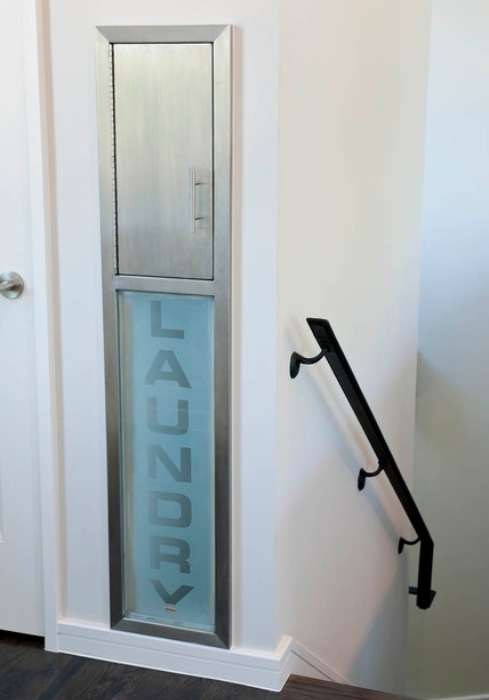
Step 4: Finishing Touches
- Install the Laundry Chute Door: Once the duct is in place, install a preassembled laundry chute door at the top of the chute.
- Patch and Paint: Close up the wall with new drywall, tape, and apply joint compound. Sand smooth once dry, then prime and paint to match the existing walls.
- Test the Chute: Drop a few items down the chute to ensure everything is working smoothly and that there are no blockages or snag points.
Safety and Maintenance
- Regular Inspections: Regularly check the integrity of the chute, especially the joints and the door hinge.
- Fire Safety: If your local codes allow installation, ensure that the chute does not compromise the fire safety of your home. Some chutes may need additional modifications or fire-resistant materials depending on local regulations.
- Clean Periodically: To prevent build-up and potential blockages, clean the chute periodically by sending a damp cloth attached to a long rod through the chute.
Conclusion Installing a laundry chute can significantly enhance the functionality of your home by simplifying the process of managing laundry. By carefully selecting the location, ensuring compliance with building codes, and following detailed installation steps, you can enjoy the benefits of a laundry chute safely and efficiently. Remember, the key to a successful installation is preparation and attention to detail, ensuring that every step, from planning to finishing, is meticulously executed.