If you’re short on yard space or simply want to add a touch of green to your balcony, crafting a vertical herb garden is an excellent solution. This project is ideal for renters or those with limited outdoor areas, making it possible to enjoy fresh herbs right at your fingertips. Not only does this setup save space, but it also adds a decorative element to your outdoor living area. Let’s explore how you can create a functional and stylish vertical herb garden using simple materials and a bit of creativity.
Materials Needed:
- One 3’x50’ roll of weed barrier
- 1” x 2’ copper pipe
- Sewing machine
- Straight pins
- 5’ cotton rope
- Scissors
- Selection of herbs (such as basil, thyme, parsley, etc.)
- Potting soil
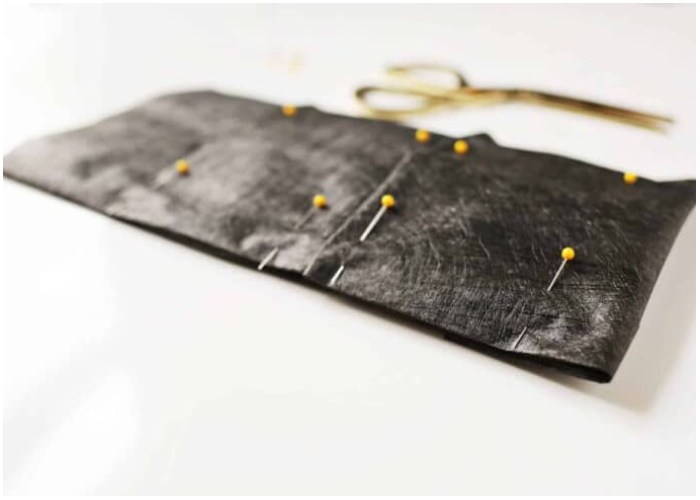
Step 1: Prepare the Fabric
Start by cutting 11 feet from your roll of landscape fabric. Fold this piece in half lengthwise and secure it with straight pins every 6 inches along where the edges meet. It’s easier to handle this large piece of fabric on a spacious, clean floor. Once pinned, sew along the pinned edge, leaving about 1/4″ seam allowance. Remove the pins once you’re done.
Step 2: Create the Pockets
Measure 16 inches down from one of the short edges of your fabric, then fold the fabric up to create a pleat at the 8-inch mark. This will form your first pocket. Secure the pleat with straight pins across, ensuring it’s even. Repeat this process every 16 inches, creating a total of five pockets. If you have excess fabric at the bottom, fold it under the last pocket and pin in place.
Step 3: Stitch the Pockets
Begin by measuring 16 inches from one of the shorter edges of your fabric. At this point, fold the fabric upwards to create a pleat at the 8-inch mark; this folding method will form your first pocket. Make sure to hold the pleat in place by placing straight pins horizontally across the fold, ensuring that the pleat is even and smooth. This is essential for the stability and uniform appearance of your pockets. Repeat this pleating and pinning process at 16-inch intervals down the length of the fabric, creating a total of five pockets. As you approach the end of your fabric, you may find that there’s excess material beyond the last pocket. Neatly fold this excess fabric underneath the final pocket and secure it with pins to maintain a tidy edge.
Step 4: Prepare for Hanging
Once your pockets are pinned in place, lay the fabric flat to begin sewing. Start by stitching down one of the long sides of the fabric. It’s crucial to reinforce each pocket’s corners with a back stitch for added durability. These back stitches will help prevent the pockets from tearing when they are filled with soil and plants. After completing one side, proceed to sew down the opposite long side of the fabric, repeating the reinforcement at each pocket corner. Lastly, sew a straight line up the center of the fabric. This central stitching line helps to divide the pockets further and provides additional support to the structure of the garden. Make sure to remove all straight pins as you sew to prevent them from damaging your sewing machine.
Step 5: Install the Hanging Mechanism
Cut your cotton rope into two equal lengths. Slide each piece through the ends of the copper pipe, tying a secure knot at each end. Ensure the knots are tight and tuck them inside the pipe ends to keep them out of sight.
Final Setup
Choose a sunny spot where your herbs will thrive. Hang your new vertical herb garden from hooks or overhangs. Fill each pocket with potting soil and plant your herbs. Make sure to water them regularly, especially if you live in a dry climate. Consider using a coco liner inside each pocket to help retain moisture.
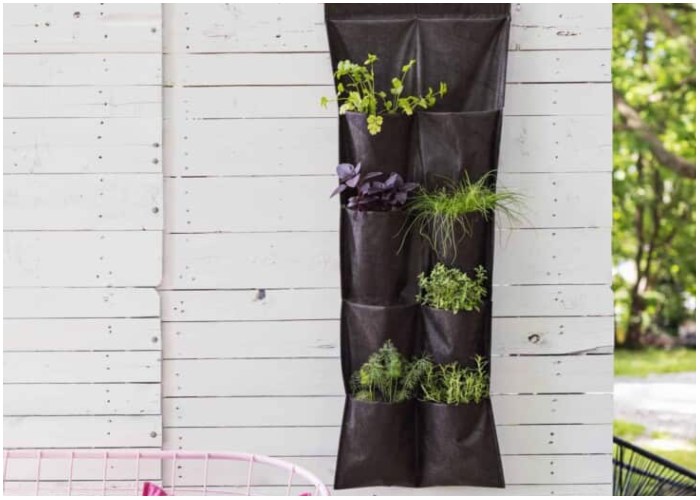
Conclusion
A vertical herb garden not only saves space but also transforms your outdoor area into a lush and productive spot. This project is straightforward enough for beginners and can be customized to fit any size space. Whether you’re a seasoned gardener or a novice looking to green your environment, this vertical herb garden is a practical and beautiful addition to your home. Enjoy the convenience of having fresh herbs at your disposal, enhancing your cooking with flavors right from your garden.