Keeping your family’s gear organized can often be a challenge, but with a little DIY spirit, it’s easy to make a functional and tidy storage system for your garage. I recently set up a simple cubby system using wooden crates, which has drastically reduced our stress and helped us stay on top of our busy schedule. Whether it’s for sports gear, seasonal accessories, or general odds and ends, this project helped us easily find our stuff and be on time for practices and events. Here’s how you can make your own cubby system for your family’s garage in just a few hours!
Why Garage Cubbies?
We all know how stressful it can be to run late for events because you can’t find your stuff. In our household, golf equipment was the biggest culprit. Shoes, balls, towels, and even lefty golf gloves were often misplaced and mixed in with other things like garden tools or the electric drill. By putting up individual cubbies for each family member, we created designated spots for all their things. It’s made going to practices so much easier!
Materials and Supplies You’ll Need
Before you get started, gather all the materials and tools necessary for the project. Everything cost me less than $75, and here’s what you’ll need:
- Wooden crates (I bought four crates from a local craft store)
- 8 wall brackets (2 per cubby)
- Screws to attach the brackets to the crates and walls
- Drywall screws for areas where studs weren’t available
- Baskets for additional under-crate storage
Tools:
- Screwdriver
- Stud finder
- Leveler
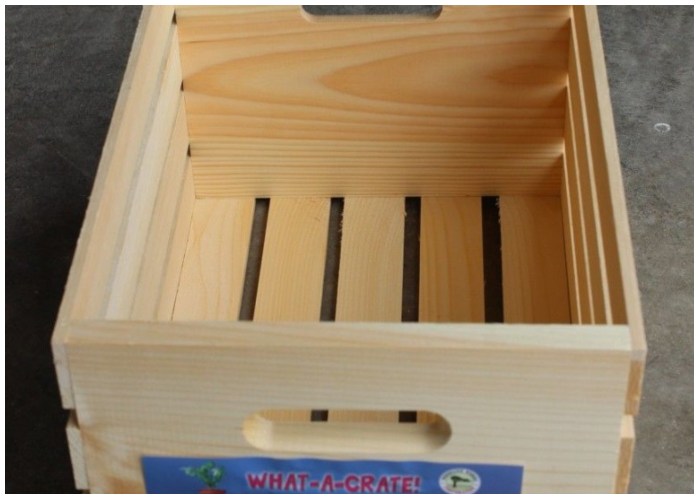
Step 1: Prepare the Crates
Start by purchasing wooden crates from your local craft store. These crates will serve as the cubbies. Measure and inspect them to make sure they fit your wall space. Depending on your needs, you can paint or stain them to match your garage’s style, but I left mine natural.
Step 2: Find the Studs
Using a stud finder, locate the studs in your garage wall. Studs provide the strength needed to securely hold the cubbies, especially when you’re storing heavy items like shoes or golf balls. If studs aren’t available in certain areas, use drywall screws to ensure stability.
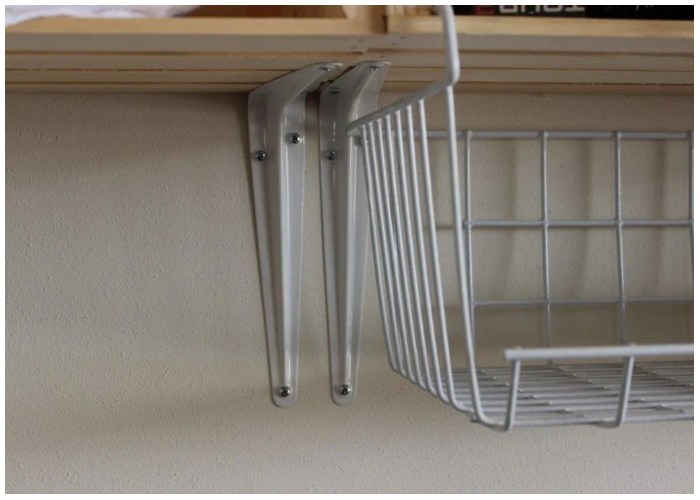
Step 3: Install the Wall Brackets
Attach wall brackets to the sides of each crate. You’ll need two brackets per cubby for extra support. When attaching the brackets, make sure at least one screw per bracket goes into a stud for added strength. If you’re placing multiple cubbies side by side, make sure to install the brackets next to each other for symmetry and security.
Step 4: Secure the Crates to the Wall
Once the brackets are attached to the crates, secure them to the wall. Use a leveler to ensure that your crates are straight before tightening the screws. Having straight cubbies will not only look better but also make them more functional when holding various items.
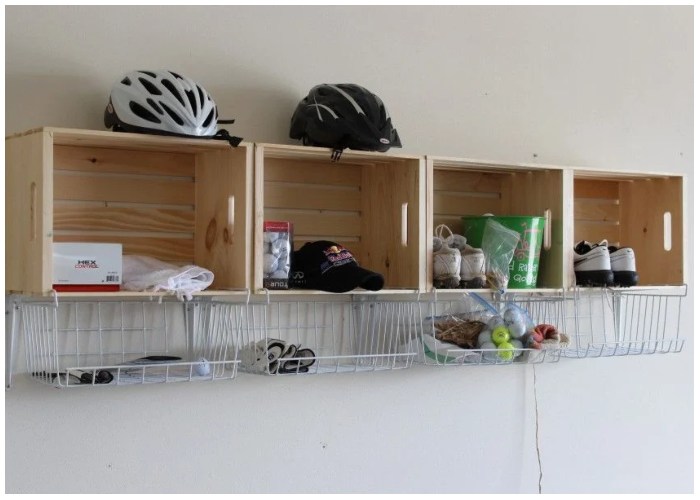
Step 5: Add Baskets for Extra Storage
To maximize space, I added baskets that hang under the crates. These baskets are perfect for storing smaller items like towels, gloves, and tees. You can easily find these baskets at any home goods store or even repurpose ones you already own.
Pro Tips for First-Timers
- Ask for Help: If this is your first time taking on a project like this, don’t hesitate to ask for assistance at your local hardware store. Even if you don’t need help, bringing in one of the crates can be helpful when choosing the right brackets and screws.
- Take Measurements: Make sure to measure your garage space and plan where you want each cubby to go before starting. This ensures that you won’t run into issues with spacing once the project is underway.
An Organized Garage Is a Happy Garage
This cubby system was a straightforward and rewarding project that truly transformed our garage. Not only did it help us organize our belongings, but it also added a touch of personalization for each family member. If you’re looking for a simple way to declutter your garage and make life a little easier, give this DIY project a try. The added benefit of having your stuff organized will save you time and stress, especially when rushing out the door to practices or events. Plus, you’ll have more space in your garage without the clutter!