Dressing up babies is a delightful experience, especially when you can make the outfits yourself. DIY projects are even more enjoyable when they are for your little one. Babies look incredibly adorable in rompers, and making a cute outfit from an existing diaper cover can save you a lot of time and effort. This guide will walk you through the process of creating a sweet baby halter top romper. Using a diaper cover as the base simplifies the project, making it quicker and easier. Plus, you can customize the romper with different fabrics and trims to create unique looks. Follow these steps to make a charming outfit for your baby.
Materials Needed
- Diaper cover
- 1/2 yard of cotton fabric
- 1/2 yard of fringe trim
- Fabric glue
- Cutting mat, rotary cutter, and ruler
Measuring and Cutting the Fabric
Babies vary greatly in size and length, so it’s best to customize the pattern to fit your baby. Start by putting the diaper cover on your baby and measuring how tall and wide you want the finished halter top to be. Use a scrap piece of fabric to help visualize and assess the size, pinning it to the cover. Keep in mind that the diaper cover waistband stretches, so mark where the halter fabric will cover when stretched. Also, ensure the top of the halter is wide enough to cover the desired area when ruched later. For reference, a trapezoid for a 3-month-old weighing 12-13 pounds might measure 5 1/2″ at the top, 6″ tall, and 11″ at the bottom. Once you’ve determined the dimensions, add 1/2″ to each side edge, 1″ to the bottom edge, and 1.5″ to the top edge for hemming. Cut the shape from your fabric. It’s a good idea to double-check your measurements before cutting to ensure the perfect fit. The choice of fabric can also add to the overall aesthetic, so consider using prints, patterns, or even textured fabrics to add an extra layer of cuteness to the romper.
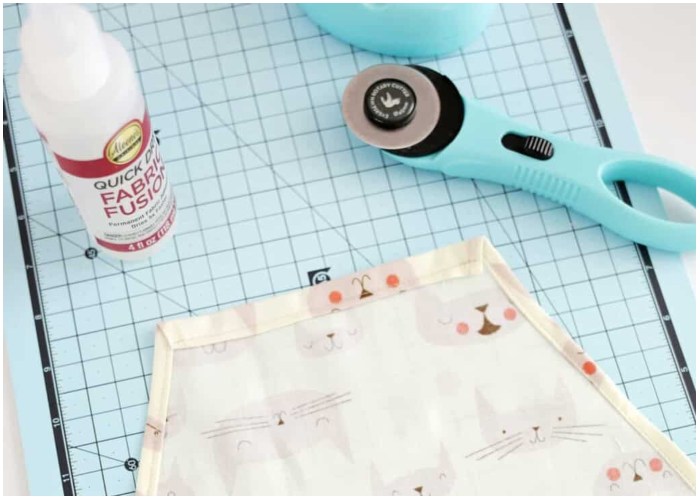
Sewing the Hem
Use an iron to fold and press a 1/4″ hem on each side of the trapezoid. Fold another 1/4″ and press again, then sew the hem closed. For the bottom edge, fold and press a 1/2″ hem twice, then sew. For the top hem, fold and press a 1/4″ hem twice, then sew. Fold the top again by 1″ and sew with a 3/4″ seam allowance to create an opening for the neck tie. The precision in pressing and sewing the hems ensures that the edges are neat and professional-looking, which is essential for a polished finished product. Take your time with this step to make sure all hems are securely sewn and evenly folded.
Assembling the Romper
Place the diaper cover inside out over a book or mat to keep it stretched. Glue the bottom edge of the trapezoid to the top inside edge of the diaper cover and let it dry. Cut a 1″ strip for the halter top tie, pressing each edge 1/4″ towards the center, then fold over again and sew. Use fray check on the ends to prevent unraveling. When attaching the fabric to the diaper cover, ensure that it is centered and evenly aligned to maintain symmetry. Turn the diaper cover right side out and slip the tie through the top seam opening, knotting each end to secure. Attach the fringe trim around the stretched top edge of the diaper cover with fabric glue and let it dry. Adding the trim can be a fun way to personalize the romper further. You could use different types of trim, such as lace or pom-poms, to match the fabric and create a unique look.

Final Touches and Customization
After the glue has dried and the trim is securely attached, you can add any final touches to enhance the romper’s appearance. Consider sewing on small decorative elements like buttons, bows, or appliqués to give the outfit a more personalized and charming look. These additional details can make the romper even more special and unique for your baby. Another aspect of customization is the fabric choice for the halter top tie. You can use the same fabric as the romper or choose a contrasting fabric to add visual interest. Ensure that the tie is securely sewn and that the ends are treated with fray check to prevent unraveling over time.
Tips for a Perfect Fit
As your baby grows, you may need to adjust the size of the romper. The beauty of this DIY project is its flexibility. You can easily modify the dimensions of the trapezoid and the length of the halter top tie to accommodate your baby’s growth. Regularly check the fit of the romper and make adjustments as needed to ensure comfort and ease of movement. Additionally, consider the weather and choose fabrics that are appropriate for the season. Lightweight cotton is ideal for summer, while flannel or fleece can be used for cooler months to keep your baby warm and cozy.
Enjoying the DIY Experience
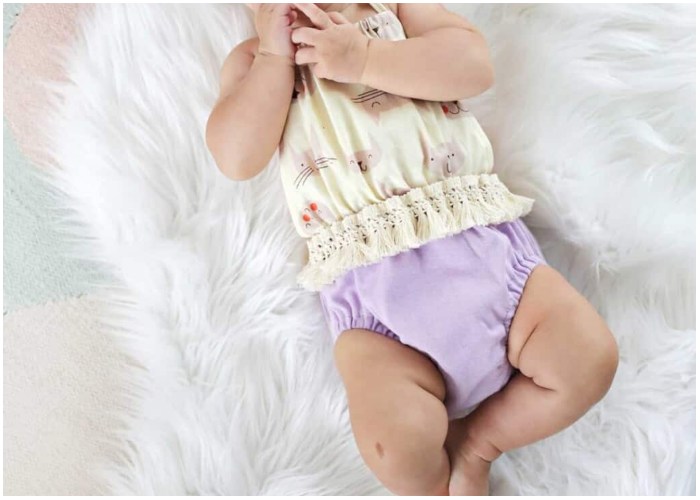
Creating a baby halter top romper is not only a practical project but also a joyful experience. It allows you to infuse your creativity into your baby’s wardrobe and create cherished memories. Whether you’re making the romper for your own baby or as a gift for a friend’s little one, the effort and love put into the project will be evident in the finished product.
Your adorable baby romper halter top is now ready for your little one to wear. This DIY project is quicker because you use an existing diaper cover, and you can customize it with different fabrics and trims for a unique look. Enjoy making your baby even cuter with this fun and easy project! By taking the time to create personalized clothing for your baby, you’re not only saving money but also creating special pieces that reflect your style and care. Each romper you make will be a testament to your love and creativity, making these moments even more precious.