Unlock the potential of your childhood crayons by transforming them into a striking piece of art. This DIY project turns simple crayons into an eye-catching display suitable for any creative space, whether it be a playroom or an artist’s studio. The process involves melting crayons on canvas to form unique, colorful patterns and textures. This artistic endeavor not only breathes new life into ordinary wax crayons but also produces captivating, colorful artwork that can enliven any room. Ideal for crafters of all skill levels, this guide provides a detailed walkthrough on how to create your own melted crayon artwork, emphasizing that it’s particularly suited for adults or older children due to the use of high heat tools.
Materials and Tools Needed
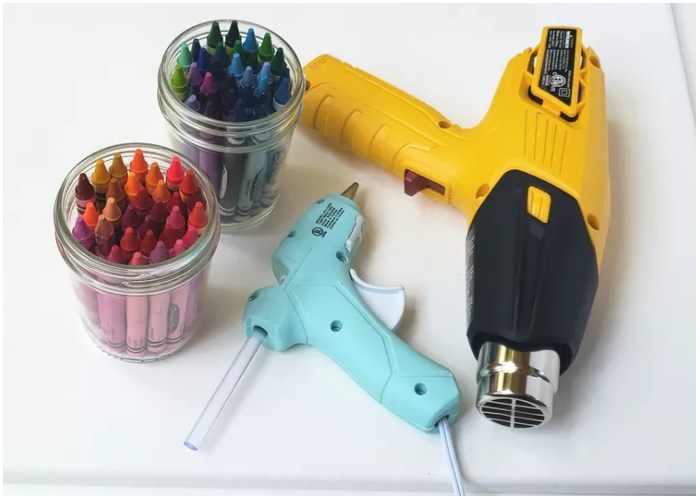
To get started, you’ll need a robust set of materials:
- A large box of crayons (70 or more for variety)
- An 18 x 24-inch canvas (or any size that suits your space)
- A hot glue gun for affixing crayons
- A heat gun or a hairdryer with a diffuser for melting the wax
Choosing Your Canvas and Layout
The size of the canvas can vary depending on where you plan to display your art. Larger canvases work well for dramatic effect, while smaller ones are perfect for intimate spaces or grouped displays. When selecting crayons, consider how the colors will blend as they melt—placing analogous colors (those next to each other on the color wheel) together can prevent the colors from turning muddy.
Preparation Steps
- Layout the Crayons: Arrange your crayons along one edge of the canvas. The arrangement can follow a specific sequence like a gradient or rainbow, or be random for a more abstract effect. Leave a small space at each end to create a natural frame for your artwork.
- Gluing the Crayons: Apply a strip of hot glue to each crayon and press it firmly onto the canvas. Position the crayons with their labels facing up to add an artistic touch that celebrates the color names.
Melting the Crayons
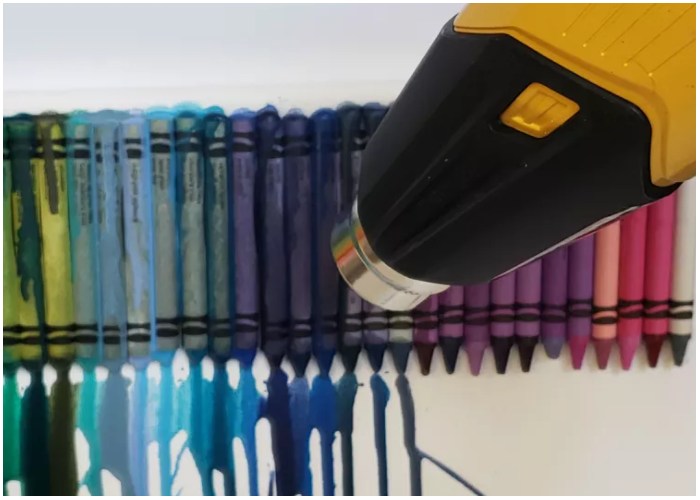
- Setting Up for Melting: Tilt the canvas at an angle over a protected surface to catch any drips. Starting from one end, apply heat with the heat gun or hairdryer to melt the crayons. The wax should start to drip down the canvas, creating elongated streaks of color.
- Adjusting the Flow: Move the heat source slowly along the row of crayons, allowing the wax to melt uniformly. Adjust the angle and distance of the heat gun to control the flow and direction of the melting wax. For a varied texture, manipulate the heat to splatter or spread the wax.
Finalizing Your Artwork
Once you have covered the entire row of crayons and are satisfied with the distribution of melted wax, allow the canvas to cool. The wax will set quickly, creating a durable and vibrant finish. If needed, use additional passes of the heat gun to intensify colors or add more layers.
Displaying Your Art
When the wax has fully cooled and hardened, your new piece of art is ready to be displayed. This dynamic artwork is a great way to brighten up any room—consider hanging it in a spot that receives plenty of light to highlight the vivid colors of the crayons. Additionally, experimenting with different backgrounds or adding elements like negative space designs can elevate the sophistication of your project. This technique can also be adapted to create seasonal decorations or personalized gifts, making each piece a unique and thoughtful creation.
Creating melted crayon art on canvas is not only a fun and creative activity but also a fantastic way to repurpose old crayons into something beautiful and new. Whether you’re decorating your home or looking for a unique gift, this DIY project offers a colorful and creative solution.