Building a DIY raised garden bed is a fantastic addition to any backyard, offering easier maintenance and enhanced accessibility. If the idea of bending and kneeling is becoming less appealing as you age, a raised garden bed is a perfect solution. It minimizes strain on your back and knees, and with the right materials, such as durable cedar boards, your garden bed will not only function well but also look great for years to come. Follow this simple guide to create your own raised garden bed and enjoy the reduced physical stress and increased gardening pleasure.
Materials Needed
- (9) 5/4 x 6 x 8ft cedar deck boards (actual dimensions: 1 inch x 5 7/16 inches x 8 feet)
- 1 1/2 inch Kreg screws (opt for Blue Kote screws if available, as they are better for outdoor use)
- (6) 1 1/2 inch x 1 1/2 inch x 24 inch cedar stakes (can be made from a cedar 4 x 4)
- 2 inch deck screws or other suitable outdoor screws
- Circular saw
- Kreg Pocket Hole Jig
- Kreg Right Angle Clamp (optional)
- 4 Sawhorses (optional)
- Drill
- Impact Driver
- Mallet
- Level
- Tape Measure
- Pencil
- Eye protection
- Gloves
Step 1: Cut the Boards to Size
Begin by measuring and cutting your cedar boards. You’ll need to cut 6 of the 8-foot boards in half, giving you 12 pieces, each 4 feet long. This will be used for the sides of the garden bed. Ensure your measurements are precise and use a circular saw for clean cuts. Take extra care to ensure that each cut is straight and uniform to ensure that the boards fit together perfectly in the later steps.
Step 2: Drill Pocket Holes
Next, drill three pocket holes at the end of each of the smaller boards using your Kreg Pocket Hole Jig. These holes are crucial for joining the boards together securely. Make sure the pocket holes are spaced evenly and drilled on the side of the board that will face inward, so they won’t be visible once the garden bed is assembled.
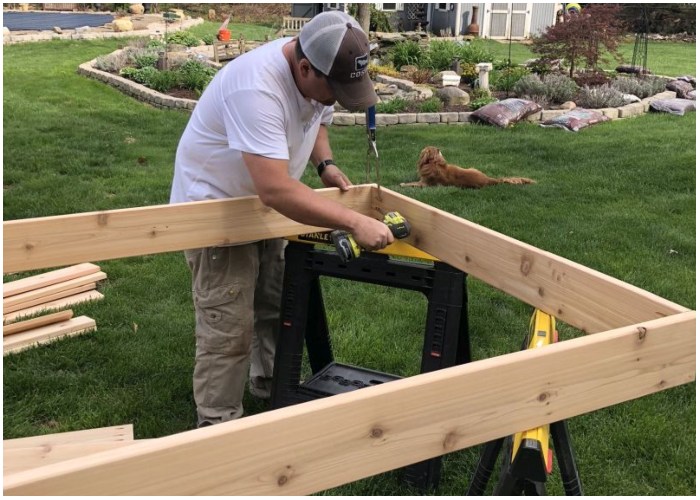
Step 3: Assemble the Garden Bed Frames
To assemble the frames of your garden bed, set up your work area at a comfortable height—using sawhorses can help. Use the Kreg Right Angle Clamp to hold the boards at right angles and attach them using the Kreg screws. This step can typically be a one-person job with the right tools, saving time and effort. Begin by connecting two boards to form a corner and continue attaching boards until you have completed the rectangular frame. Ensure each connection is tight and secure to provide a stable base for your garden bed.
Step 4: Hammer in the Stakes
Once the basic frame is assembled, add vertical stability by hammering the cedar stakes into each corner of the frame. If your garden bed is longer, consider adding additional stakes along the sides for extra support. These stakes not only help keep the garden bed anchored but also prevent the sides from bowing once the bed is filled with soil. Hammer each stake at least 6 inches into the ground, or deeper for additional stability.
Step 5: Level and Secure the Frame
Place the frame in the desired location and check for levelness, especially if the ground is uneven. Adjust as necessary by adding or removing soil under the frame. Once level, drill pilot holes and secure the frame to the stakes with 2-inch deck screws. This will prevent any movement and ensure the garden bed remains sturdy. Double-check the entire frame for stability and make any necessary adjustments.
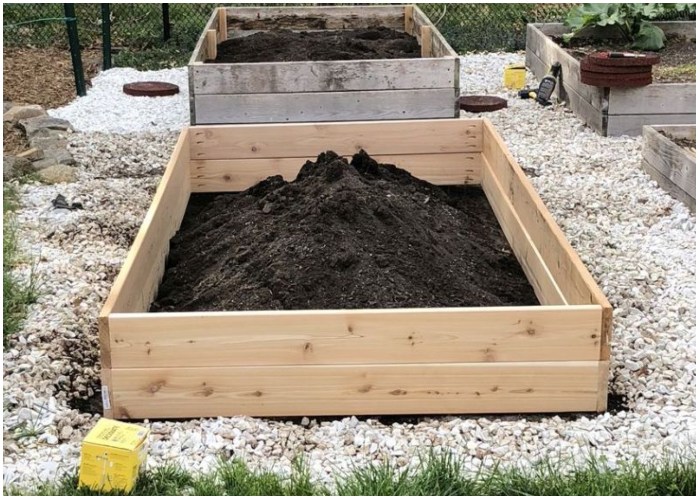
Finishing Touches
After securing the frame, fill it with a mixture of topsoil, compost, and peat moss to create an ideal growing environment for your plants. Depending on your budget, you can choose high-quality garden soil from garden centers or utilize local soil and enhance it with compost. Mix the materials thoroughly to ensure nutrients are evenly distributed. Now you’re ready to plant your favorite vegetables, herbs, or flowers and enjoy gardening with ease.
Conclusion
Raised garden beds are an excellent way to reduce the physical strain of gardening and can add a neat, organized appearance to your yard. With the right tools and materials, building your own raised garden bed can be a rewarding weekend project. As the wood weathers, it will blend beautifully with your garden landscape, making your effort worthwhile with every season that passes. Enjoy your gardening with less bending and more satisfaction!