If you’re a plant lover looking for a unique and stylish way to display your green companions, making a boho-style plant hanger might be the perfect project for you. With just a few supplies and a little bit of time, you can create a beautiful plant hanger that adds a touch of nature to any room. This project is ideal for beginners and can be completed in under an hour for around $10.
Materials and Tools Needed
- Unfinished wood disk with a pre-drilled hole
- Five strands of cotton cording
- Two skeins of embroidery thread
- Scissors
- Two to three potted plants
Step-by-Step Instructions
- Prepare Your Materials: Start by gathering all your materials. The wooden disc is a key component—it typically comes with a pre-drilled hole which eliminates the need for power tools. You can leave the wood unfinished for a rustic look or paint it to match your home décor after a light sanding.
- Cut the Cotton Cording: Measure and cut your cotton cording into five equal pieces. The length of each piece will depend on how long you want the hanger to be. Shorter lengths provide more stability, which is beneficial if you’re hanging heavier plants.
- Tie the Base Knot: At one end of the gathered cords, tie a knot to secure all five strands together. This will form the base of your plant hanger.
- Secure the Disk: Arrange four of the cords around the outside of the wood disk to hold it in place. Thread the fifth cord through the center hole of the disk. This center cord adds extra stability to the structure.
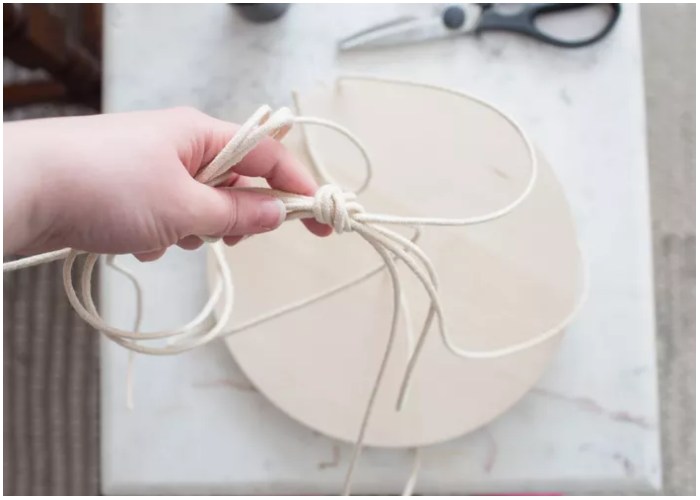
thesprucecrafts
- Knot the Top: Lift the disk and gather all the cords at the top. Determine where you want the top of your plant hanger to be, keeping in mind the size of your plants and the hanging space. Adjust the cords so that the disk sits flat and even. Tie a knot at the top to secure everything in place.
- Decorate with Embroidery Thread: Add a decorative touch by wrapping embroidery thread around the cords just below the top knot. Start by tying the thread and then wrap it around the cords to add a pop of color. You can incorporate a second color if desired.
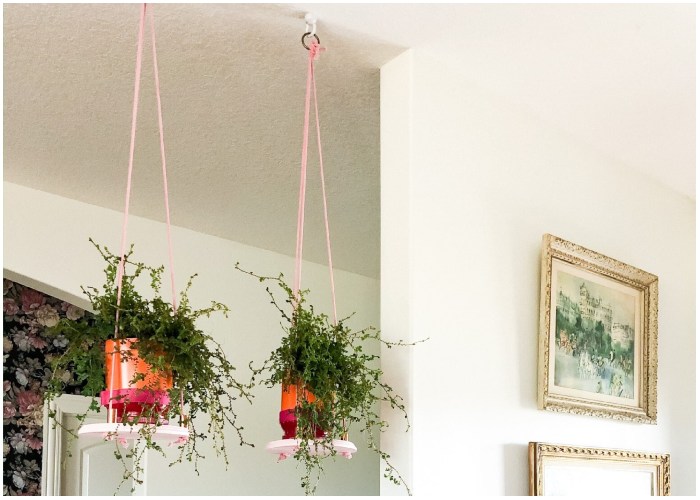
- Final Adjustments and Hanging: Before hanging, ensure that the knots are tight and the disk is level. Hang your new plant hanger from a ceiling hook or similar fixture. When adding plants, aim for balance to prevent the hanger from tilting. Using plants of similar weight or arranging them strategically will help maintain stability.
Additional Tips for Enhancing Your Plant Hanger
- Weatherproofing: If you plan to hang your plant hanger outdoors, consider treating the wood disk with a weather-resistant sealant. This will help protect the wood from moisture and sun damage, extending the life of your plant hanger.
- Creative Twists: Experiment with different types of cords such as jute, hemp, or colored nylon for a different look. Each material can add a unique texture and feel to your project.
- Layering: For larger spaces, consider creating multiple hangers of varying lengths to create a layered effect. This can be particularly striking in corners or over dining areas where they won’t obstruct walkways.
- Maintenance: Regularly check the integrity of the cords and knots, especially if you’re hanging heavier plants. This will help prevent accidents and keep your plant display looking its best.
Creating your own plant hanger not only offers a functional way to display your plants but also provides a satisfying DIY experience. This simple project can also serve as a thoughtful handmade gift for fellow plant lovers in your life.